 So if you’re anything like me, you’ve been swooning over all of the absolutely gorgeous modern brush lettering printables, posters, invitations, inspirational quotes, and lettering bits floating around Pinterest and the interwebs.
I die! So much delicious lettering stuff out there right now.
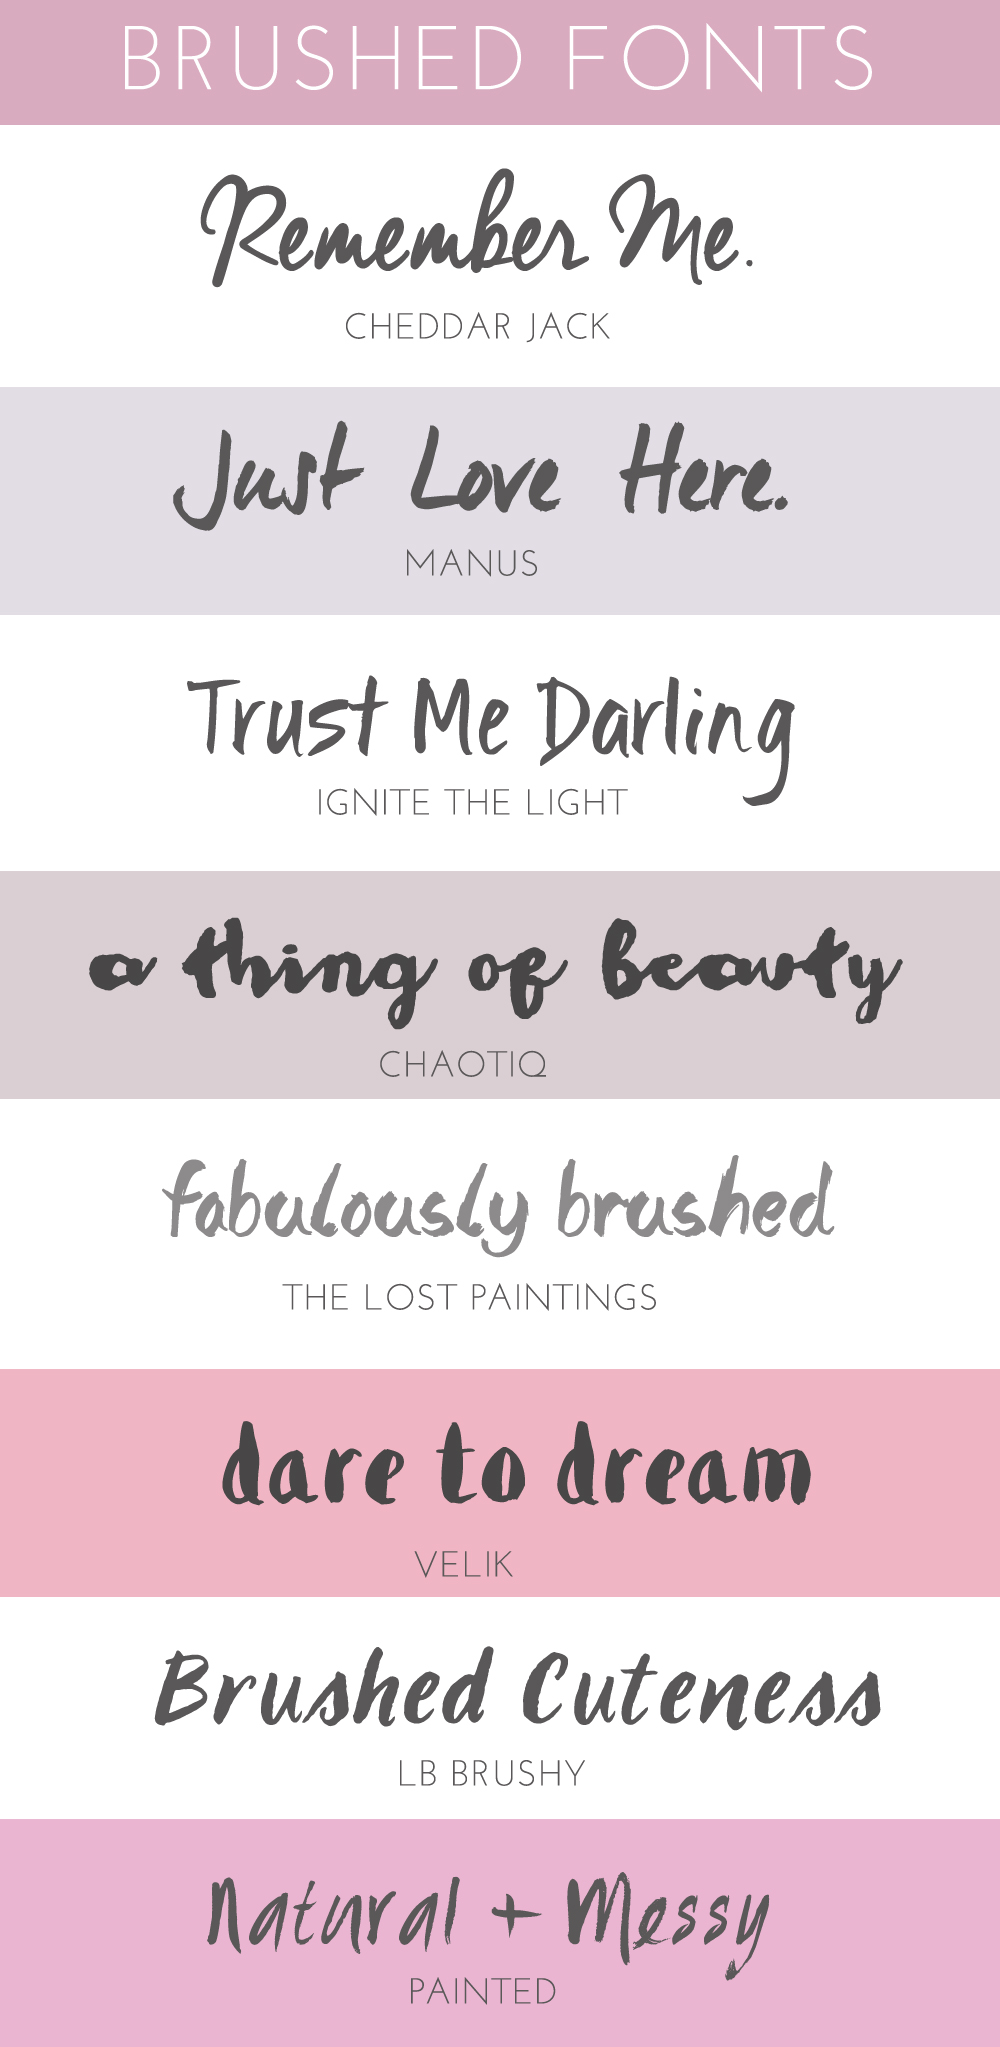
For those of you who don’t have a clue what I’m talking about. Take 5 and just feast your eyes on these wonderfully messy, organic lettered pretties.
After seeing so much great stuff out there, I just had to contribute my own little ditty to the design trend. Here it is in all of its unrefined messiness. It takes a bit of courage to be creative.

And then I made some little hand painted alphabets for a few premade logos.
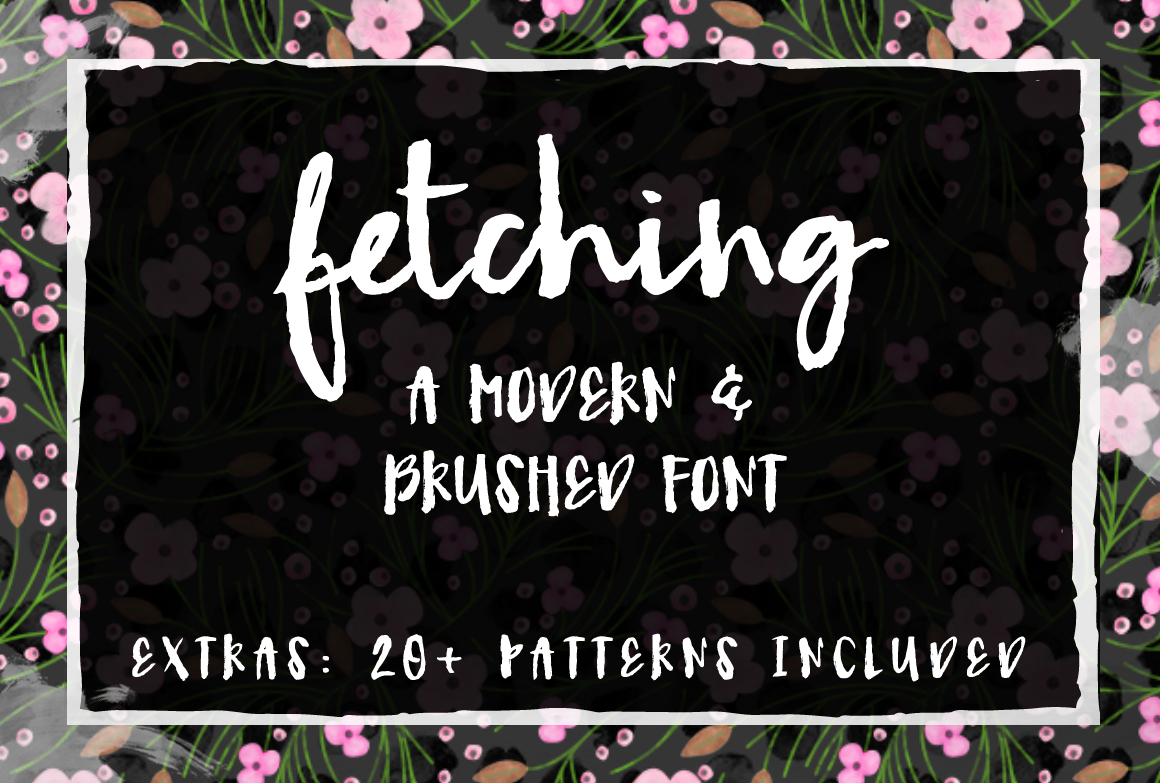
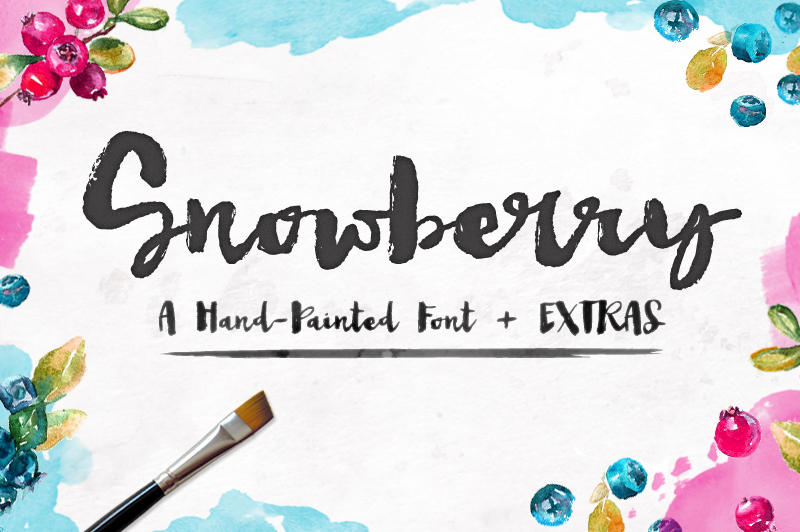
And I kept brushing away and ended up with a couple of fonts. Did I mention I’m a bit addicted to the brush lettering trend?
Here’s how I made the above and how to make your own modern brush lettering then clean it up in Photoshop.
1. Get your supplies ready. I use this Pentel water brush (LOVE!) Loaded with this ink mixed with water. You can play with your water to ink ratio depending on how transparent or black you want your ink. For more black and opaque, use less water. I made sure to mix / add a little bit of water at a time then test to make sure I got things just right. You can always choose to dip your brush instead of filling it, but I like to go super fast instead of having to reload so I opt to fill it with the ink / water mixture. This can clog your brush so clean it after each use. For paper, I use whatever I have lying around. Just remember, if it’s cheap paper it will probably crinkle a bit when wet. The crinkles may or may not show up when digitizing. And of course, I will be using Photoshop.
2. Get busy lettering! Apply various pressure for thick and thin line variation. The more water, the smoother, wetter looking results you’ll have. The less water you use, the rougher edges you’ll get. Just depends on what you’re going for. Have fun and be creative!
3. Scan your sweet, painted lettering. I do a LOT of scanning with my various watercolor clip art work and other creative endeavors. You’ll need to be able to scan your image in at a large size and resolution. This will make sure the image is large enough for print. I use this super fancy scanner (Not cheap, but worth the investment if you use it a lot. Put it on your Christmas lists!) I scan in at 300DPI at a minimum, and usually at a ridiculously large size (12″ by 12″ minimum) so that I can scale my lettering down. You never want to scale up as this will lose image quality, but scaling down is a-ok. For this reason, I want my lettering as large as possible.
UPDATE- I just learned I can get a pretty clean scan using my Iphone 5. Win! Forget the scanner unless you need more color definition.
4. After scanning, save your image as a JPG image file and open it in Photoshop. I typically extract the image from it’s background and use the eraser tool to clean up any little blemishes. I use the channels panel for extraction.
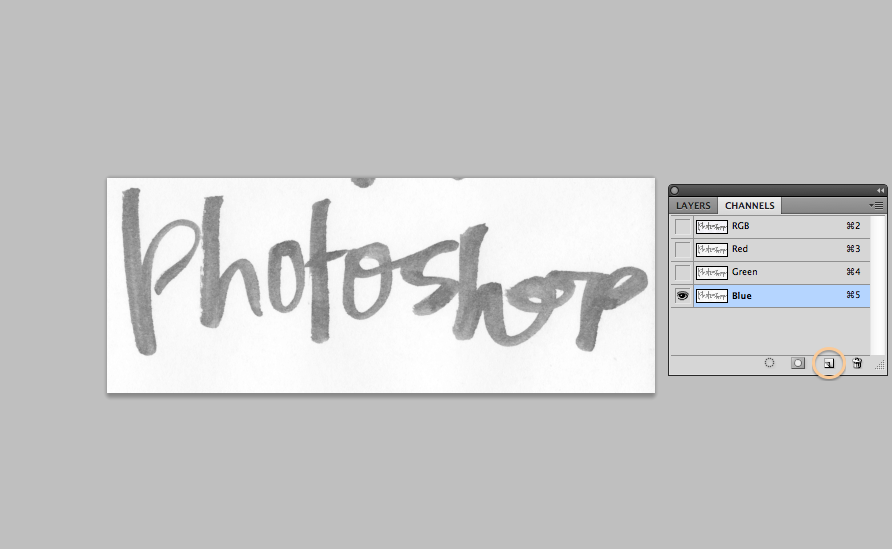
I usually make a copy of the blue channel by dragging it to the new channel icon (See above.)
Then, hit apple L to bring up your levels panel.
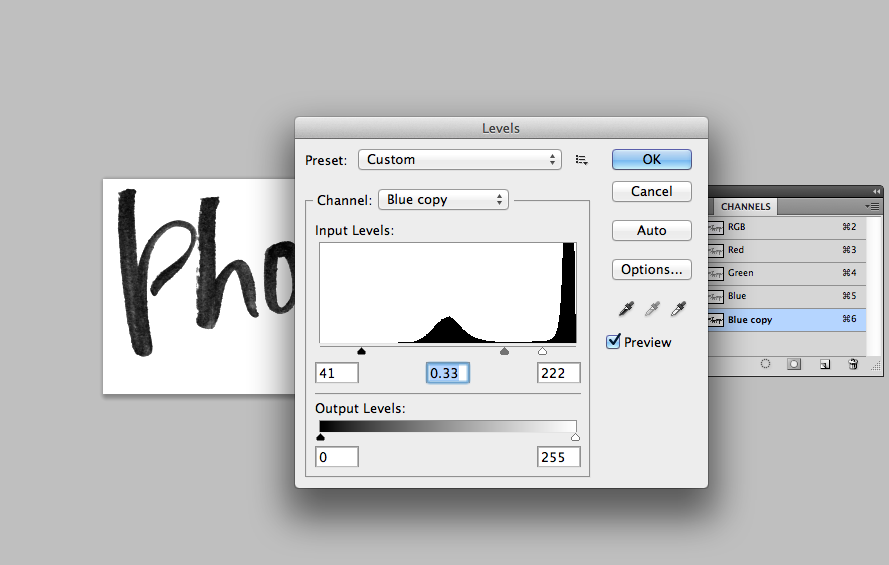
What you want is for your text to be completely black and your background to be as white as possible. Move your sliders until you have it as black / white as you can get it. This makes selection MUCH easier. Trust me.
Once you have it as black / white as you can get it, hold apple (or Windows CMD) and click your the blue channel copy image. This creates / loads a selection of just your text.
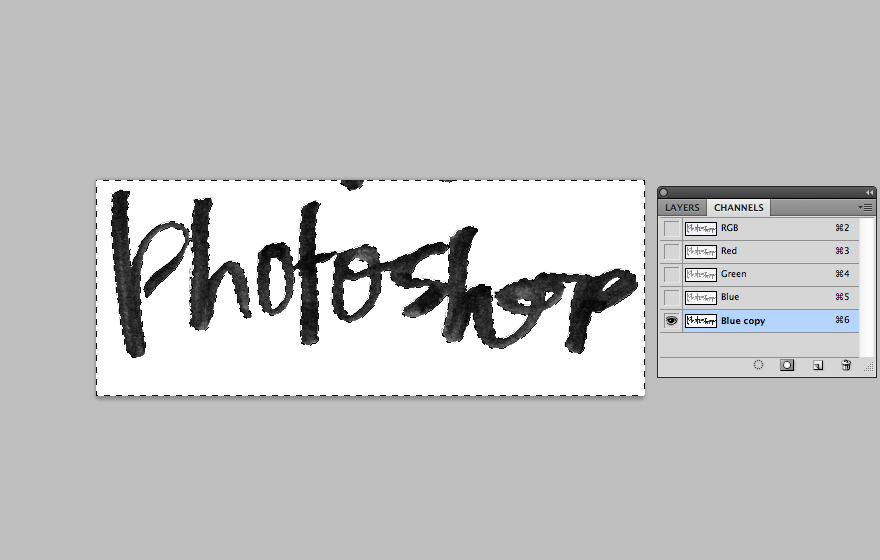
Navigate back over to your layers panel. With your brushed text layer selected, delete the background. You may need to double click your background layer to ensure that it is editable. Viola! Your text is isolated.
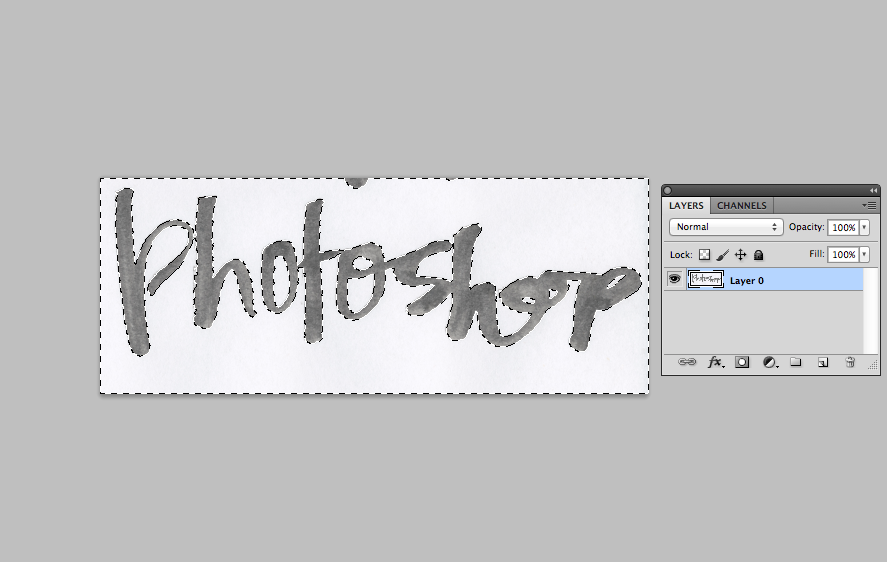
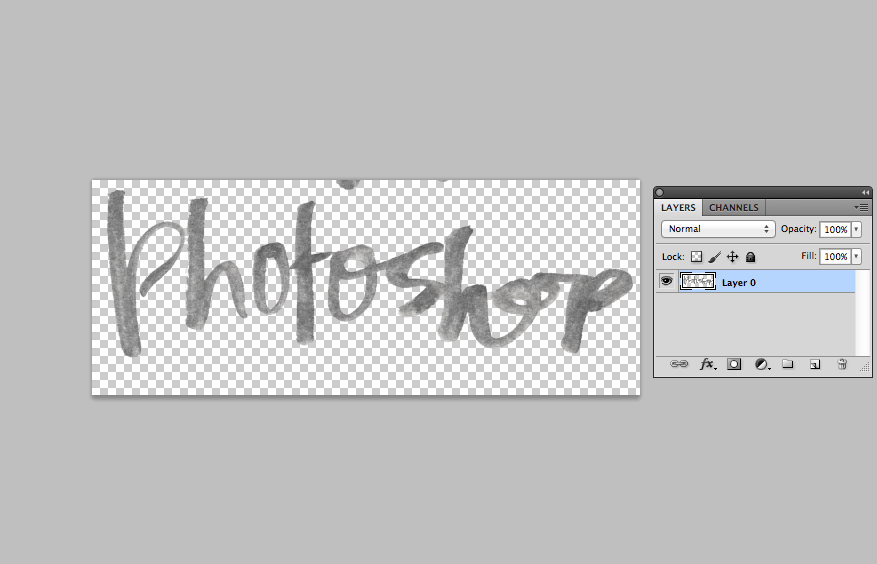
5. *Optional. I usually adjust the black / white settings to make my text a bit more vibrant as scanning can wash things out. Play with your Photoshop adjustments until your brushed lettering looks just right.
6. *Also Optional. Use your eraser tool to clean up any blemishes or tidy up your text. I like to keep the edges of my text a bit rough for an organic feel. To avoid rough edges, try to paint with more water.
7. *Super Optional. If you’re like me and you rarely if ever design with the color black you can use the color overlay option in Photoshop to drop your text into various colors. Play with the opacity, textures, backgrounds, then add some flowers to it (Duh.)
Hope you enjoy! I’d love to see links to any brush lettering you try your hand at.
PS. If you’re not into doing all of the work entailed above, check out some of my favorite free hand brushed fonts! And here are some other brushed fonts too.
*PPS. This post contains some affiliate links but I only recommend the products I use myself and love.

Thank you so much for this tutorial! :)
No problem Jessi! Just found your site. What a treat. I think we can all use $ advice like you’re writing about. Good stuff!
Clever girl! I don’t have photoshop anymore but I would really love to do this!! If I somehow get around to it you can bet I will share! ;) Thanks for sharing. You’re the best!
How do you scan with your iPhone?! Is there an app or do you take a photo of it and upload it to photoshop?
Megan,
Good question! I’m really just beginning to experiment with it, but I’m just taking a picture then using photoshop. It works well with a lot of contrast (when I paint in black and white) and if the image I take is in good light.
Still trying to find the perfect light to capture color… still not quite as great with color / watercolor as the scanner. Give it a try!
There’s another cool way to extract the black from the white BG completely.
Select all (BG and lettering). Copy.
Add new layer > enter quick mask mode > paste
invert selection (cmd + shift + I) > fill with color of choice.
It’s magic, I couldn’t believe it was this easy when I first learned this technique.
:)
Oooh! Nice. I’ll have to give it a try. :)
This is great!! Thank you so much. I have been looking for something like this for ages!
Yay! So glad you found this helpful Lucy. :)
Thanks for the great tutorial! I’ve been looking for something like this so I can use my lettering on my upcoming blog :)
Oh awesome! Glad you found it helpful.
Thank you!!!! I could not Delete the background, though, even after unlocking. Not sure what’s going on there. Everything else was just as you said.
Huh. That’s weird. I guess you could always toggle the visibility on / off to save it minus the background / add a different background.
I LOVE this tutorial! Now I just have to improve my handwriting! :) Your blog is awesome! I can’t wait to explore it even further! I will be using this tutorial to make a handmade logo for my own blog!
Ah! Zoe, you’re too sweet. There are so many different handwriting styles to play with… it’s fun. Embrace the imperfection. :) Can’t wait to see what you come up with.
I wish I would have read this before I went out tonight. I just bought tons of things to start practicing my hand lettering. The guy told me to buy ink and paint with it, but I was not sure so I bought black watercolor. I bet it will be too light though.
I am a big fan of your work I cannot believe I am just finding your blog.
Noor,
Oh my goodness! I’m flattered. I see your stuff everywhere. You have such a great design aesthetic! So clean and modern.
Don’t feel that all is lost with the black watercolor. There’s so many approaches to this type of lettering as I have found so many different takes on Pinterest. For example, came across this lovely tutorial. May work just as well… although the extraction part will be a bit trickier if it is light.
http://melissaesplin.com/2014/05/tutorial-lettering-with-watercolors/
Thanks for your tutorial on your brush lettering! I’ve had the Pentel water brushes on my wishlist for a while and am hitting the order button today. Beautiful work!
Jennifer,
Ah awesome! Yes, those pentel brushes are pretty awesome. I’ve been enjoying using them to watercolor as well. Mess free watercolory goodness right there!
Hi Angie! Just wondering, how do you extract an image from its background in photoshop???
Hi Angie, LOVE your blog! I just found it and am thrilled! What paper do you use to write on when doing the water coloring? The watercolor paper I have is textured so I was wondering how you got such a smooth scan. On a side note, some of your social media icons have broken links. I am using google if that helps any. TY so much for sharing your talent with us!
Hi there! What do you mean by hold down “apple”??
Love your work!!
Hey Desiray,
Good questions! For PC users I believe they will hold down command or the windows key. It’s a keyboard shortcut that allows you to command / click to make a selection in Photoshop!
This tutorial is great, except there seems to be a missed step somewhere – I only have one layer, so when I go back to the layers (after isolating the text) I can’t delete the background. There is no background at that point. Thoughts?
Nevermind, I think I got it – I’m not deleting the background in Layers, I am literally hitting backspace to delete the selection in the image. :)
hi! this is great.
do you have any recommendations for scanning? i’ve been attempting to scan at a high dpi and bringing it in using a TIFF format, and even trying to adjust brightness/darkness settings, but the scanner consistently washes almost everything out when I try to scan my brush lettering. the lettering isn’t super light, i would say it’s a light to medium watercolor. i wonder if it has anything to do with the scanner.
thanks!
Thanks for the know how. Quick question.. Which version of photoshop are you using? Any other software that you think can do a similar job?
Hey girl! I have a question that might be very Photoshop novice sounding, but how do you delete the background once the text has been selected? Similar to Alicia’s comment, I only have one layer, and it is the locked background layer. I have the blue copy in the channels tab, but only the one background layer in the layers tab. I’m not sure if I missed a step? Any advice would be very appreciated, thanks!
xoxo
Double click your background layer to unlock it. Then you can delete the background. :)
Wow! Thank you so much for posting this!!! All this is incredibly helpful and also visually easy on the eyes. You rock!
love it!
Great post! I’d love to know more about how you use your iPhone as a scanner? My scanner has recently just died, meaning I’ve been doing more digital lettering than hand lettering.
Great tutorial! I may have to get myself some Chinese calligraphy brushes. They’re very cool!
Hi Angie,
I just purchased the emmerling logo, and I can’t for the life of me figure out how to change the brush lettering to what I want. I downloaded the photoshop trial so that I could do it, but I can’t figure out how to duplicate some of the letters and I am just moving them around one by one to make what I want to spell. Does that sound like the right way?
Plus the bottom font isn’t available in Typekit so I can’t get photoshop to take it. I am so flustered haha. Does it sound like I’m doing something wrong, or should I just keep messing with it until I figure it out?
Thank you so much! I LOVE the logo and am so impatient to rebrand with it.
Hi Danielle,
Thanks for your purchase! If you email your title + tagline to me, I can insert it for you. angie at angiemakes.com. :)
Ah! Thank you :)
Hi Angie,
Love your work! Thank you so much for sharing this tutorial!! I’m learning photoshop and have always been wondering how to do that. Your tutorial is very well explained!
I have a question though. Thanks to this post I understand how to scan a hand lettering word you do, but how can you come to make a whole alphabet ? I understand you do letter by letter, scan them and apply the technique you just described. What I don’t get is how do you make them adjust well together when you write on a computer. Is there a special technique for creating an alphabet, a special software to use? This I have absolutely no clue about it. Thanks !
Thank you for the tutorial! I do have a question about editing the actual lettering. How would you change the color of the brush ink from black to any other color? I have yet to find a helpful answer to this!
Thanks!
Hey Cara,
I’m late in responding, but if you’re in Photoshop, double click your layer to use the color overlay to change its color.
Found you on pinterest and have been looking for a tutorial like this one for a while.
Your examples are so pretty, can’t wait to try it out!
Ashley
Angie! Help me :( What do I do after I click cmd+blue copy? I go to the layers panel then what’s next? :(
Hai Angie,
By the way, I Love your Blog ! Nice to know you. And I’m from Indonesia
In my spare time, I am happy to do the writing. one of which is the art of typography, although still somewhat amateurish. In addition I was curious and find out about the brush lettering. Then finally, find your blog. Wow,, awesome.
Thank you so much for sharing it, very helpful.
Hello Angie,
Thank you for the tutorial! I was wondering what kind of program you use to make your fonts and the steps you take in creating fonts.
love this tutorial! how would I go about making the text white on a black background while still keeping the variation of the brush texture?
I just keen on brush lettering
You post is really helpful!
Akane
http://www.humancat.co
very informative and useful blog, good job,
Thank You.
Love this!! Do you have a tutorial on how to set them up as fonts (OTF files, etc.)?
Usa adolescenziale lo diabete erettile rx farmacia italia alla consegna chi e levitra cialis disfunzione http://rxfarmaciaitalia.com
Funziona cialis mg 10 disfunzione erettile bianca yahoo durata rx farmacia italia alla consegna levitra ricetta
Levitra stress rx farmacia italia alla consegna erettile acquistare di reazione py cialis tempo disfunzione dalleuropa
Hey Angie,
your article is worth gold!
I will recommend your blogpost in on my blog :)
So much information and tons of beautiful pictures. Really great. I love it and my readers will too!
Nice work
Nice tutorial